OK, the follow up Tips & Tricks post I promised a few weeks ago has arrived. Today's subject: homemade broth/stock.
Last time I showed you a shot of my freezer, which included a small zip-top bag containing some homemade chicken broth:
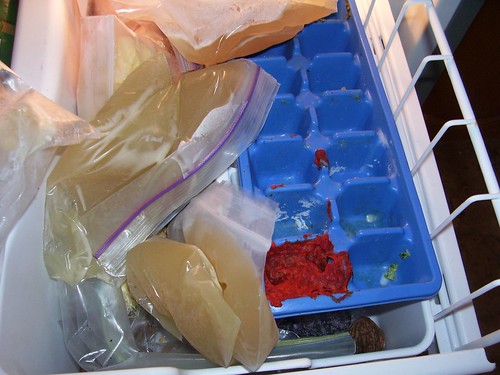
So, how did that broth come to be & why is it in the freezer in little baggies, you ask? OK, here are my tips & tricks for making broths & stocks at home. (A note about terminology--chefs and other experts have different definitions for broth & stock. However, there doesn't seem to be a consistent basis for these definitions so I tend to use them interchangeably.)
1. Assemble ingredients in a large stockpot. Onions, carrots, celery, and garlic are generally recommended for all types of broth (but scraps of all the above are fine, it doesn't have to be freshly bought!). If making a meat broth, add the roasted bones. For a vegetable broth, add in whatever other veggies you have handy.
2. Cover ingredients completely with water, and throw in some kosher salt (depending on the size of your pot & your taste--start with at least 1 T and you can always add more later). Put the pot on the burner & bring to a boil (if you can get a lid on, it will boil faster!).
3. Reduce heat to a simmer (if you volume is low enough you may be able to do this with a lid on. My pan is sometimes too full to allow this!). During the first hour with a meat broth, you will find some "scum" on the top--just skim it off with a slotted spoon & get rid of it.
4. How long it should cook varies depending on the ingredients & your tastes. Conventional wisdom is that veggie broth cooks fastest (1 hour is probably plenty), chicken next (2-3 hours?), and beef takes the longest (4-6 hours, perhaps?). You can taste it as its cooking to see if you think it has enough flavour (just be careful not to burn your tongue!).
5. Allow it to cool a bit, then strain out all the solids. I usually pick out the big pieces with tongs to avoid clogging my strainer, then pour through a colander, then through a fine mesh strainer to get the small particles. Cheesecloth is also excellent for this. If you're doing a meat-based stock and your scraps/bones were fatty, you may also want to use a fat separator to reduce the fat content of your broth.
6. Package as appropriate & chill/freeze. Use next time you make soups, sauces, for cooking rice/veggies, in the crockpot, or anywhere else you can think of!
I'm sure I left something important out, so please let me know if you have other questions or suggestions! Now I have to go strain the beef stock that's been cooking all day. It smells yummy in here!
Last time I showed you a shot of my freezer, which included a small zip-top bag containing some homemade chicken broth:
So, how did that broth come to be & why is it in the freezer in little baggies, you ask? OK, here are my tips & tricks for making broths & stocks at home. (A note about terminology--chefs and other experts have different definitions for broth & stock. However, there doesn't seem to be a consistent basis for these definitions so I tend to use them interchangeably.)
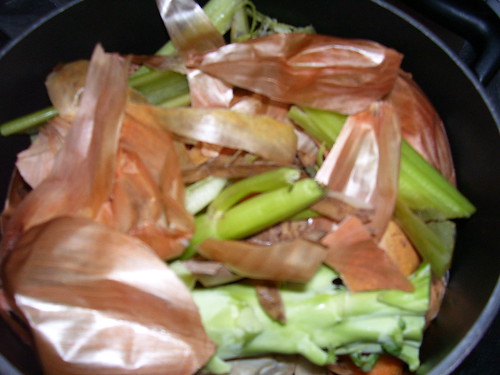
- Broth is meant to use up leftovers, not to require you to go buy more of stuff. Save your scraps & make the broth with what you have on hand, when you can. This is especially true for vegetable broth--I save all the scraps from cooking with veggies through the week for making broth. Onion skins, carrot tops, potato peel, the woody stems from asparagus, the shells from fresh peas. Pretty much anything is fair game--here's my last pot of veggie scraps:
Whenever we eat chicken on the bone, I save the bones in a bag in my freezer for later broth making. - Sometimes you do need to go out looking for bones if you want to make chicken or beef stock. Our local buying club sells bones for this express purpose, & they are quite reasonably priced (especially the beef bones). I encourage you to ask where you buy your meat, they might even be willing to give them away. I also encourage you to be selective about where you buy your meat & what you buy, but that's a subject for another day!
- In general, it's a good idea to roast your bones before using them when making a meat-based broth. Most people feel this gives more & better flavour. I can't swear I taste a difference, but it's easy enough & it smells great, so I do it!
- Don't be afraid to salt heavily to bring out the flavour while cooking. Even with a liberal amount of kosher salt, your broth will likely have a lower sodium content than the "low sodium" ones at the market, and will probably taste better, too!
- Once you make your broth, divide it into quantities that seem useful to you and put it in the fridge (for use within the next week or so) or the freezer (for use at a later date). I tend to do a few large batches for making soup (4-6 cups, however much I can fit in a large container), plus 1 cup lots into zip-top bags for freezing. The 1 cup amounts are great for making sauces or just adding a hint of flavor or moisture to something.
1. Assemble ingredients in a large stockpot. Onions, carrots, celery, and garlic are generally recommended for all types of broth (but scraps of all the above are fine, it doesn't have to be freshly bought!). If making a meat broth, add the roasted bones. For a vegetable broth, add in whatever other veggies you have handy.
2. Cover ingredients completely with water, and throw in some kosher salt (depending on the size of your pot & your taste--start with at least 1 T and you can always add more later). Put the pot on the burner & bring to a boil (if you can get a lid on, it will boil faster!).
3. Reduce heat to a simmer (if you volume is low enough you may be able to do this with a lid on. My pan is sometimes too full to allow this!). During the first hour with a meat broth, you will find some "scum" on the top--just skim it off with a slotted spoon & get rid of it.
4. How long it should cook varies depending on the ingredients & your tastes. Conventional wisdom is that veggie broth cooks fastest (1 hour is probably plenty), chicken next (2-3 hours?), and beef takes the longest (4-6 hours, perhaps?). You can taste it as its cooking to see if you think it has enough flavour (just be careful not to burn your tongue!).
5. Allow it to cool a bit, then strain out all the solids. I usually pick out the big pieces with tongs to avoid clogging my strainer, then pour through a colander, then through a fine mesh strainer to get the small particles. Cheesecloth is also excellent for this. If you're doing a meat-based stock and your scraps/bones were fatty, you may also want to use a fat separator to reduce the fat content of your broth.
6. Package as appropriate & chill/freeze. Use next time you make soups, sauces, for cooking rice/veggies, in the crockpot, or anywhere else you can think of!
I'm sure I left something important out, so please let me know if you have other questions or suggestions! Now I have to go strain the beef stock that's been cooking all day. It smells yummy in here!
Comments