Assembly
Before you put your houses together, get organized. Cover some cardboard pieces with foil to use as bases for each house (I think we used pieces that were roughly 10"x10"--we had some extra sturdy cardboard from packaging in the basement, if using regular corrugated you might want to double it up to hold the weight of a house). Sort all your cooked and cooled pieces and make sure you have enough of everything. Make a plan.
Traditionally one uses royal icing to put the houses together, but the drawbacks there are using raw egg (you can sub meringue powder, but that would have required a trip to a specialty store. I don't generally mind a bit of raw egg, but making houses for other people's children had me nervous about it) and it takes time to set, so you have to hold each piece in place while it dries. For making six houses, the time factor was important. So we tried the "melted sugar" technique I had read about.
Initially this was NOT a success, because my early reading was not specific enough. It all just referred to melting some sugar and painting it on like glue, so I put some sugar and a bit of water in a pan as suggested, waited for the sugar to fully melt, and then went for it. I should know better than that--anyone experienced at all with sugar work/candy making would know the sugar would start crystallizing as soon as you put something in it at that stage. Plus the things I was "gluing" weren't holding at all. So off to the internet I went, and after combing several blogs finally found one that mentioned waiting until the sugar had fully carmelized to use it. Of course.
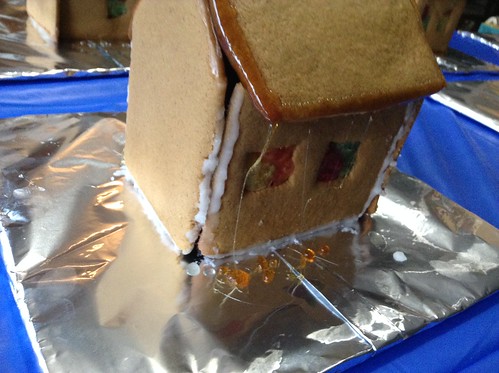 (those white lines there? That's the sugar from the first attempt, where it had just barely melted but not browned at all)
So, starting over again with a pan full of sugar, a bit of water, and a drizzle of corn syrup to help the sugar remember not to crystallize. Cook, cook, cook, until it's nice and golden brown, then turn the heat down super low and hope it doesn't burn before you finish. Then, exercising great caution (I sustained one burn at the end when I got careless), begin gluing your house. No small children allowed for this step, no matter how good they are in the kitchen--hot sugar is just bad news, and it's too easy to accidentally drip a bit, have some spatter, etc.
My recommendation for assembly: take one base piece, dip the bottom edge in the pot of melted sugar (note to self: use tongs to hold the piece! That would have saved my skin). Immediately place the sugared side onto your foil base, hold for a few seconds, and tada, it's glued nice and firmly! For the next piece, dip both the bottom AND the side that will connect to the already placed piece (this part is where the danger comes in, when you turn an already dipped side you need to make sure the sugar doesn't touch your skin). Place it on the board, hold briefly, and carry on with the entire foundation. The roof is slightly trickier, which is why I think next time I would make the roof pieces a bit longer so I had some extra cookie to work with.
When you're first starting out, your technique may be sloppy. And towards the end when the sugar gets cool, it might be thick, and also therefore sloppy. But the happy result of this is drips that might look like icicles or other fun designs! Next year I might even try to get fancy and make designs.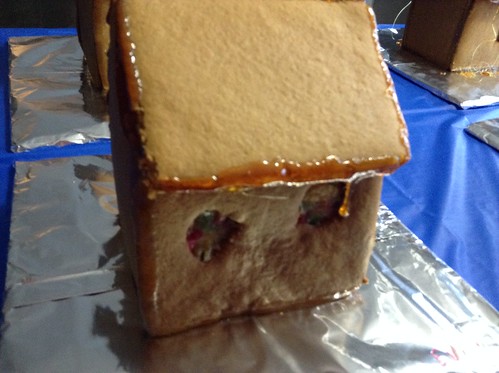
Before you put your houses together, get organized. Cover some cardboard pieces with foil to use as bases for each house (I think we used pieces that were roughly 10"x10"--we had some extra sturdy cardboard from packaging in the basement, if using regular corrugated you might want to double it up to hold the weight of a house). Sort all your cooked and cooled pieces and make sure you have enough of everything. Make a plan.
Traditionally one uses royal icing to put the houses together, but the drawbacks there are using raw egg (you can sub meringue powder, but that would have required a trip to a specialty store. I don't generally mind a bit of raw egg, but making houses for other people's children had me nervous about it) and it takes time to set, so you have to hold each piece in place while it dries. For making six houses, the time factor was important. So we tried the "melted sugar" technique I had read about.
Initially this was NOT a success, because my early reading was not specific enough. It all just referred to melting some sugar and painting it on like glue, so I put some sugar and a bit of water in a pan as suggested, waited for the sugar to fully melt, and then went for it. I should know better than that--anyone experienced at all with sugar work/candy making would know the sugar would start crystallizing as soon as you put something in it at that stage. Plus the things I was "gluing" weren't holding at all. So off to the internet I went, and after combing several blogs finally found one that mentioned waiting until the sugar had fully carmelized to use it. Of course.
(those white lines there? That's the sugar from the first attempt, where it had just barely melted but not browned at all)So, starting over again with a pan full of sugar, a bit of water, and a drizzle of corn syrup to help the sugar remember not to crystallize. Cook, cook, cook, until it's nice and golden brown, then turn the heat down super low and hope it doesn't burn before you finish. Then, exercising great caution (I sustained one burn at the end when I got careless), begin gluing your house. No small children allowed for this step, no matter how good they are in the kitchen--hot sugar is just bad news, and it's too easy to accidentally drip a bit, have some spatter, etc.
My recommendation for assembly: take one base piece, dip the bottom edge in the pot of melted sugar (note to self: use tongs to hold the piece! That would have saved my skin). Immediately place the sugared side onto your foil base, hold for a few seconds, and tada, it's glued nice and firmly! For the next piece, dip both the bottom AND the side that will connect to the already placed piece (this part is where the danger comes in, when you turn an already dipped side you need to make sure the sugar doesn't touch your skin). Place it on the board, hold briefly, and carry on with the entire foundation. The roof is slightly trickier, which is why I think next time I would make the roof pieces a bit longer so I had some extra cookie to work with.
When you're first starting out, your technique may be sloppy. And towards the end when the sugar gets cool, it might be thick, and also therefore sloppy. But the happy result of this is drips that might look like icicles or other fun designs! Next year I might even try to get fancy and make designs.
Comments